Terms with a spyglass icon are defined at the bottom of the blog.
The Beans-to-Greens Grow Guide: Step 5
Step 5 of 6: Feed the flowers
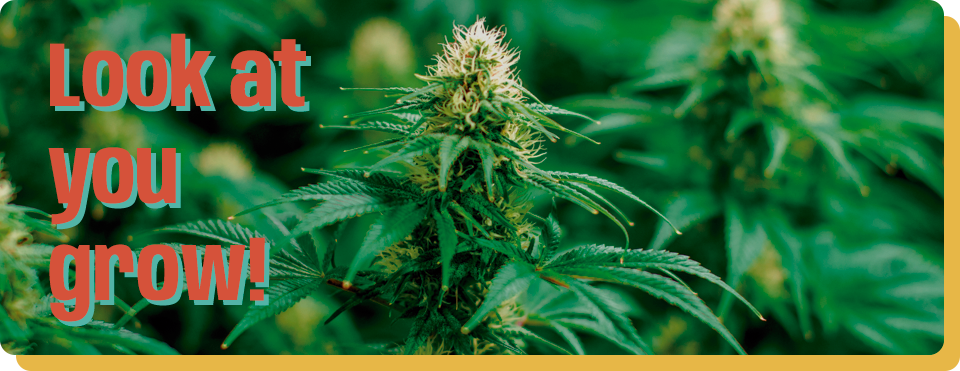
The Funky Beans Method: Look at you grow!
 Don’t lie…if you haven’t already been taking pictures of your plants, you’ve definitely thought about it. They just look so awesome!
Vibrant green, full, fluffy, and ready to flower. Congratulations, you have grown cannabis.
By now, your plants have made it through their two-to-four week veg period, during which time they’ve started sporting their characteristic foliage, extended branches, and noticeable nodes (bud sites). The flowering period has the longest duration of all of the steps, about eight to 12 weeks, starting when there’s a distinct reduction in the available light.
 Outdoor growers would have ideally timed their grow so that seeds were planted in spring or early summer, and the plants went through their vegetative stage through the peak of summer. As the season transitions to fall, available light decreases and naturally triggers flowering.
Plants will remain vegetative for as long as the light is available over 16 hours. In order to mimic the seasonal transition and flip plants into flowering, indoor growers must manipulate light to 12 hours or less.
 This step is all about ensuring your plants are putting as much energy as possible into producing the best buds, also known as generative growth. Generative cues are essentially introducing stressors to the plant, which signals that prime growing conditions are diminishing and they need to get their reproductive content out there ASAP.
You want your plants to get the message that it’s time to get their flowers nice and high, for optimal pollinating position. For us home-growers, these tall buds will not only be easier to harvest, but they also indicate properly-cued plants that have produced ripened bud.
Now we need to discuss trimming, bracing, and yes – identifying prime harvest time for your plants. Your plants will be going through distinct changes on a week-to-week basis. Here’s what to look for and how to coerce your plants into prime production.
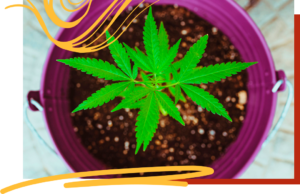
Stuff You’ll Need:
![]()
Light – HPS lights or LED lights, since both of these systems are able to produce the high PAR value necessary for this step. (See a breakdown of these light systems in Step 4)
Humidistat and thermometer
Water with supplements – We widely employ the application of supplements in a water solution.
- Soil-Activating Mycrobes (mykos) – Find a full explanation of dilution and dosing in Step 2
- Growth-Promoting Coconut Powder – A powerhouse solution of potassium, this is a supplement specific to the flowering stage.
Airflow – As would be the case in the great outdoors, cannabis plants thrive with some moving air. A standard fan works great.
A nutrient blend including phosphorus and potassium – Regardless of the brand, make sure its ratio is potassium-dominant, with high levels of phosphorus and decreased nitrogen levels. This is because the uptake of nitrogen and potassium are greatest at this point in the life cycle.
Note that we recommended a blend that is nitrogen-dominant in the previous Vegetative step in our Beans-to-Greens Grow Guide: Step 4.
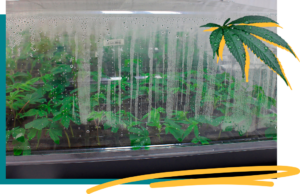
Early Weeks
The first week after entering the flowering stage, you’ll likely notice one last big growth spurt as the plants drastically stretch. They will almost double in size over two to three weeks into flowering as they gear up to bloom.
Lighting, Humidity, Airflow, Temperature, and Water
Indoor growers, here are some things to focus on to keep conditions optimal through the stretch stage for your plants:
- Light time is at 12 hours or less
- Light strength is 1200-1500 umol/s
- Leaf surface temperature is 75-80°F (ambient temperature is at 85°F with LED lights & 75°F with HPS lights)
- Relative humidity is 75-78%
Water
Focus on watering the plant, proportional to its size – this will be at a slightly higher volume than in the vegetative state. Dose with mykos water once a week, and a coconut water solution every two to three days.
Avoid over-watering to curb Pythium wilt, which can occur at any point during the growth stages of cannabis. You can recognize that your plants are “damping off” if leaves start to look grey-brown. There may be a fuzzy grey blanket on the substrate’s top or the stem’s bottom part.
Nutrient enrichment
Continue dosing the same nitrogen-rich supplement that you were using during the vegetative step (Step 4) for the first few days of flower. Then use a phosphorus/potassium supplement to feed your crop.
Middle Weeks
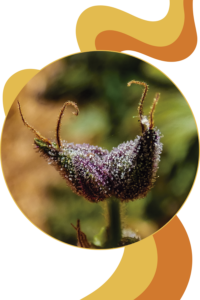
Around the third week, calyxes form at the bud sites, the first sign of what will become harvestable bud. Also, look for the development of trichomes, which is the characteristic coat of frost covering the buds.
Your plants should be about as stretched as they’re going to get, having reached their maximum height. Optimal post-stretching conditions look like this:
- Light time is at 12 hours or less
- Light strength is 1200-1500 umol/s
- Leaf surface temperature is 75-80°F (ambient temperature is at 80°F with LED lights & 70°F with HPS lights)
- Relative humidity is 70-73%
Meanwhile, you’ll notice the whole plant is bulking, which may cause the need for bracing:
Bracing
Plants may need to be bolstered with an external bracing system if they become so tall and heavy that they begin drooping. Keep it simple and secure the plant to bamboo stakes to help it stabilize. Another option is to use trellis netting, which is especially helpful for entire rows of droopy outdoor plants.
Trimming
As previously mentioned, you want your plants to focus on their flowers. Lower branches and leaves that crowd your plants will only serve to divert precious resources from the nodes.
Trim away branches and leaves that are on the lower part of the plant. You’ll want to remove the ones that aren’t positioned to receive maximum light and are crowding other leaves.
As necessary as it is to prune your plants, it also induces stress for them. So we recommend only trimming your plants twice during the flowering phase, once about a quarter of the way through (week three or four) and again at ¾ of your flower duration (around week seven or eight).
Maintain the happy conditions we discussed in the early stages regarding watering, lighting, humidity, etc.
Later Weeks
Follow your nose to your new garden variety- your plants should be emitting a strong aroma by this point. They’ll be sporting large, dense buds with white hairs, or pistils. There will be a heavy blanket of white trichomes, some of which may have already started transitioning into an opaque amber appearance.
Near Harvest
Pistils have become dark, trichomes have become amber. Omigawd. It’s almost time to harvest!
One of the most important steps at this point is to flush your plants, which includes some optimized plant-stressing. In the final three weeks prior to harvest, gradually wean off nutritive feeding, especially the level of Nitrogen, and allow more dry back periods. This means letting the soil dry out longer than usual before watering. Use pure water, without any enriching agents such as coconut water, aloe, etc.
This method of flushing lets your plants know the end is nearing and they need to put their final energy reserves into their buds. Adequately-flushed plants will produce bud without the chemical taste and aroma associated with fertilizers.
Looks like you might be ready for Step 6 of 6
Don’t jump the gun on harvesting.
The time and effort put into getting your plants to harvest could become moot if you harvest too soon. Make sure your buds are in their absolute prime before you move into the harvesting step.
In the final post of this series, we’ll help you pinpoint when exactly to harvest and how to do it so that you can fully enjoy the flowers of your labor.
Feeling ready to explore new strains? We’ll grant you early access to unreleased or limited-release seeds when you sign up for our Secret Stash seedscription.
Funky Growers rewards groupies will earn CannaCredits just by signing up for a seedscription, and with every order thereafter.
This is cannabis seed shopping, personalized and funkified.