
Funky Beans-to-Greens Grow Guide
Only 6 Steps to Success
Growing cannabis is not just for the commerical and connoissuer farmers anymore. With this easy, 6-Step Funky Beans method, the craft of growing cannabis is also for YOU. From our robust bank of strain-specific premium seeds, choose from feminized, regular, and autoflower varieties. Follow our formula and you’ll be a marijuana master in no time.

Autoflower
Happiest outside

Feminized
Happiest inside

rEGULAR
Happy inside or outside
Stuff You’ll Need to Succeed
Make sure you have these essential tools handy for every step before you get started.

Thermometer & Humidistat

magnifying glass or Jeweler's loop
Start growing with 6 easy steps
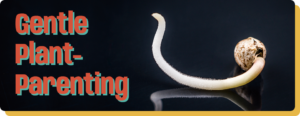
Let your seeds know it’s go-time for growing by exposing them to their optimal conditions for activation. Seeds that will yield the healthiest plants will be brown and sometimes striped. Successfully “popped” seeds will grow their taproot over a period of 2-5 days.
- Fill a glass partway with tap, well, or distilled (but not city) water.
- Add your seeds, no more than 20, to the water.
- Find a cool, dark place to leave it at room temperature (71-77F).
- Wait 24-48 hours, then check your seeds for a tail.
Before you pull your popped beans, make sure their taproot is at least double or triple the length of the seed.
Got some slow-poppers? Find detailed tips, including an alternate method, in the corresponding blog.

Getting the seed established in a favorable growing environment primes the root zone. Over a period of 1-2 weeks, this stage is critical for promoting a harmonious relationship between the seed and the soil, right from the start.
Use an inert substrate for initial planting, such as peat moss or coco coir, and do not add fertilizers. Instead, add aloe flakes and mycros, to foster an organically cooperative medium in which the roots can thrive. Carefully place the seeds a fingertip’s depth, or about an inch, into the substrate. Make sure the taproot is pointed downwards; this may be easiest to achieve with tweezers. Then, lightly cover it without packing down the soil to help oxygen reach the buried seed.
For indoor grows, do this step in their final pot to minimize transplanting and the risk of shock. For outdoor grows, we have found that a Solo cup works as well as anything for a starter vessel, before eventually transplanting to an outdoor bed (more on that later!).
WATERING PRO TIP: With a spray bottle or mister, add about a teaspoon of water to the soil as soon as you have planted your seeds.
Digging for more deets? See our corresponding blog post here.
For as long as you are seeing little sprouts with two embryonic leaves (known as cotelydons), you’re in the seedling stage – about 1-2 weeks. The goal here is to maintain ideal conditions and provide basic necessities: light, humidity, and air.
Seedlings need access to a minimum of 16 hours of synthetic light. Grow lights need to be at their lowest setting.
Your humidistat should indicate that the surrounding humidity is around 70%.
The temperature should be 82°F, with plenty of airflow.
WATERING PRO TIP: Focusing on topsoil humidity, use a spray bottle for quantity control. Lightly water the seedlings every 2-3 days.
Interested in extra insights? Read more in the corresponding blog post.

The vegetative stage begins when you see multiple nodes and leaves, with their characteristic 5-7 fingers, and is usually a duration of 2-4 weeks. This is when you can transplant outdoor-bound plants, gradually introduce nutrients, adjust lighting, and increase watering volume as the size of your plant drastically changes.
In all matters of growing cannabis, it’s a good rule of green-thumb to take transitions gradually. This is to curb the risk of shocking your plants with abrupt conditional changes.
Once your brood has reached the veg-stage, outdoor plants can be transplanted from their starter pots into beds, with at least 1 ft of spacing between them.
For both indoor and outdoor plants, now you can slowly introduce nutrients (wait 3-5 days before starting this for those that have been transplanted). Find a solution that has a higher ratio of Nitrogen to Potassium and Phospohorus. Start with a dose that’s approximately half of the labeled dosage, then work up over a few days. Look for signs of “nutrient burn,” when your plants are overexposed to fertilizers and exhibit damaged, curling leaves. If this happens, back off of the application. Likewise, yellowing or discoloration may be indicating chlorosis or necrosis, and may need to be fed more.
For controlled, indoor grows, the light time should be at 16-18 hrs. This will hold the plant in its veg stage while it strengthens to prepare for flowering, so we recommend allowing this to happen over a period of 2-4 weeks.
For outdoor grows, the power of the sun will dictate veg-duration.
WATERING PRO TIP: Focus on moderate, root-depth watering that can be achieved by pouring a small amount at the base of the plant. Water with the aloe and mykos solution every 2-3 days or as needed.
That’s a lot! Want to read more? See the corresponding blog post.

Flowering is initiated by a reduction in light availability. It begins when you notice a drastic growth spurt in your plants and, of course, the appearance of buds. This is the longest-lasting step of the process, 8-12 weeks, during which time you see the emergence of vivacious, adult plants.
Shortening days will prompt outdoor plants to flower, while this needs to be achieved for indoor plants by manipulating artificial lighting. Coax your plants into the flowering stage by reducing light exposure time to 12 hours or less. Gradually switch your fertilizing solution to a nutrient ratio that is rich in Phosphorus and contains little-to-no Nitrogen.
To ensure all of these nutrients are being used efficiently by the plant, trim lower branches and foliage that are not receiving light.
The plants will drastically “stretch” then “bulk,” starting around 2 weeks into flowering. Brace the ones that start to droop under their own weight.
Within 3 weeks of intended harvest, “flush” the plants by weaning off of nutrient-delivery (especially Nitrogen) and decrease the watering schedule. This will cue the plants to put their remaining energy into producing bud that will also be void of the chemical aftertaste of fertilizers.
WATERING PRO TIP: Focus on watering the plant, proportional to its size. Avoid over-watering to curb Pythium wilt. Use coconut water and mykos as needed. Reduce watering schedule the final 3 weeks before harvest and don’t use supplements.
Want to find out more about flowering? Scope out the corresponding blog post here.

It’s possible to beautifully clear Steps 1-5, then end up with less-than-optimal harvested crop. That’s because the harvesting stage is harrowed for its specific process of capturing product quality for which you’ve worked so hard to achieve. While it may be tempting to dehydrate bud as quickly as possible, quality-retention occurs with drying over a period of at least 2 weeks.
Throughout the flowering stage, you’ll notice buds developing pistils (hairs) and sport milky-white trichomes. You’ll know it’s time to harvest when the pistils have darkened and trichomes are an opaque amber.
Remove the entire plant from its root base at the primary stem. This is because the branches on which the buds are attached retain moisture and help keep the flower from drying out too fast. Hang the harvested plants upside down in a location at around 60°F and 60% humidity. The cool temperature and relatively low humidity helps preserve terpene integrity and optimize your bud for consumption.
Have questions about harvesting? Peep the corresponding blog for more.

15% OFF your
first order
And, 15$ in CannaCredits when you sign up to get 420 funkery in your inbox.