Terms with a spyglass icon are defined at the bottom of the blog.
The Beans-to-Greens Grow Guide: Step 2
Step 2 of 6: Plant the beans

The Funky Beans Method:
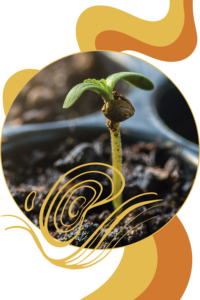
Once you see taproots that extend 2-3 times the length of the seeds, you’re ready to plant.
As is the case with all aspects of growing cannabis, there are several ways you could tackle each step. This guide illustrates the method that we recommend for home-growers of all experience levels, starting with our top-notch seeds and rendering equally top-notch weed. The Funky Beans approach is all about creating a healthy and hospitable relationship between the growing medium and the plants as they mature through their stages.
And since we’ve tested our method innumerable times, we’ve been able to troubleshoot hiccups in the process so that we can deliver a method that mitigates problems.
Follow our steps, start to finish, and you’re sure to get the best bud for your bucks.
 Stuff you’ll need
Make sure you know what kind of seeds you have and where you want to grow them. See more details on choosing the best seed from our selection in Step 1 of this blog series.
Feminized seeds grow best inside.
Autoflower seeds grow best outside.
Regular seeds are non-preferential – they grow fine in both environments.
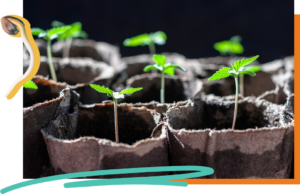
 A starter pot
For indoor plants, starter pots should be the same as the final pots. This is so that you don’t have to transplant them later and helps avoid shock for the plants.
The best final pots for organic and living soil growers are 15 gallons and for hydroponic or drain-to-waste growers are 1-3 gallons; plan to have one pot for each seed.
For small scale outdoor-bound plants that will eventually be transplanted into beds, we have found the best vessel is a standard 18 oz plastic drinking cup (like a Solo Cup). Plan to have one cup for each seed.
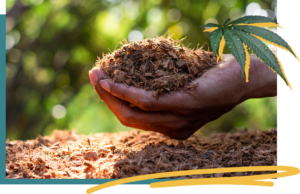
 Inert soil
We like either peat moss or coco coir.
Here’s why:
It’s critical that your starter substrate contains little, to no, nutrients. Some brands have seedling/starter mixes that have extremely low nutrient densities and are beginner-friendly to help prolong the time until nutrients are needed.
This step is all about facilitating a cooperative relationship between the microbiome of the growing medium and the root system, which is a gentle and gradual process. See which supplements we recommend instead in the points below.
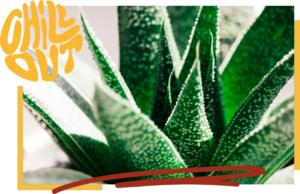
 Organic Aloe Vera Flakes
We SWEAR by this product. It contains all-natural, gently-nourishing properties that are hugely beneficial to your plants as they grow:
- Salicylic acid, which is inherently anti-inflammatory, analgesic, and antibacterial.
- Cleansing and antiseptic saponins, which are antimicrobial agents that counter bacteria, viruses, fungi, and yeasts.
 Soil-Activating Mycrobes (mykos)
For naturally beefing up the microbiome of your growing substrate and encouraging overall plant vigor.
Here’s why we love it:
Containing a high-performing biological A-Team of microbes and mycorrhizae, this inoculant creates a diverse, healthy ecosystem for plant roots.
 Spray bottle or mister
A device that will evenly deliver tap, distilled, or well water to your newly-planted seed, without changing its suspended position within the soil column.
Let’s plant those beans
Now that you’ve gathered all of your materials, it’s time to start planting:
Activate mykos by letting it bloom in water for at least 30 minutes before applying.
Here are the dilution rates that we recommend (note that the initial dose is larger to make sure that the soil is fully inoculated, while the follow-up doses are smaller):
The initial dose is one tablespoon (tbsp) for five gallons of water
Follow-up doses: 1.5 teaspoons (tsp) for five gallons of water
- Add aloe flakes to the water after the mykos have activated.
- Fill a spray bottle or mister with the solution.
- Fill your starter pot with inert soil.
- Create a hole in the substrate that’s about an inch, or a fingertip’s, depth.
- Carefully place the seed in the hole, ensuring that the taproot is down. Some people find it easier to use tweezers for this step. There should be one seed per pot.
- Lightly cover the seed with soil. By not pressing it down, you’re making sure that the buried seed will still receive plenty of air supply.
- Gently apply about 30 mL of water containing the supplemental solution. Evenly distribute it with your spray bottle as soon as the seed has been planted, so that it is activated to grow by the moisture and nutrient conditions.
- Place your starter pots where they will get at least 16 hours of light.
- Keep the topsoil moist by checking it and adding the aloe and mykos solution a minimum of once per week.
 Let’s talk about conditions
If you’re rearing outdoor plants, the best time to germinate and plant is in late-spring to early-summer. This is due to the pattern of sunlight availability through the seasons.
While the plants are getting established and bulking, they will need the maximum sunlight that occurs throughout the summer. A decrease in sunlight hours triggers the flowering stage (more on that in Step 5 of this series). This, of course, naturally happens as the seasons transition into fall.
So, if you’re an indoor grower, think about trying to “copy” those conditions for your plants.
Looks like you might be ready for Step 3 of 6
Since you’re doing such a good job keeping your seeds happy, you should be seeing a sprout within one to three days. You’re now the proud parent of a cannabis seedling. Check out our next blog in this 6-part series, Maintain the Seedlings.
Interested in saving bucks on your beans? We’ve made it hella easy when you join the Funky Growers rewards program. Earn CannaCredits with every single purchase, cash them in to save money and build your stash.


 Instagram